.jpg)
.jpg)


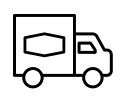
Semi-transparent soliflore and soliflore with embossed writing
How to make a semi-transparent soliflore and a soliflore with embossed writing
Materials required for a soliflore with embossed writing:
- Your empty bottle of vegetable oil or neutral base
- 1 hot glue gun
- 1 marker
- Paint in the color of your choice
- 1 brush
Precautions: Before you start, remember to protect your work area to avoid leaving glue or paint marks on your table. Remember to clean your empty pot or container before you start.
Stages of production :
1 - Start by creating your pattern or writing in marker on your bottle as a guide.
2 - Run the hot glue over it, trying to make it as even as possible. You can make it thicker or thinner as you wish.
3 - Wait until the hot glue has completely cooled and dried before painting.
4 - After drying, apply a second coat of paint to achieve an even, opaque finish.
5 - All that's left is to add your flowers inside.
Materials required for a semi-transparent soliflore:
- Your empty bottle of vegetable oil or neutral base
- Paint in the color of your choice
- 1 brush
Precautions: Before you start, remember to protect your work area to avoid leaving glue or paint marks on your table. Remember to clean your empty pot or container before you start.
Stages of production :
1 - Start by using painters' tape to mark out the areas you want to keep transparent. Ordinary transparent tape will also do.
2 - Then take your paint and brush to paint the desired areas.
3 - Allow the paint to dry completely before removing the tape.
4 - Don't hesitate to apply a second coat of paint to achieve an even, opaque finish.
5 - All that's left is to add your flowers inside.
WAAM tips :
The trend is towards repetition and multiplication, so don't hesitate to make several soliflores of the same type with containers of different sizes for a TOP decoration.
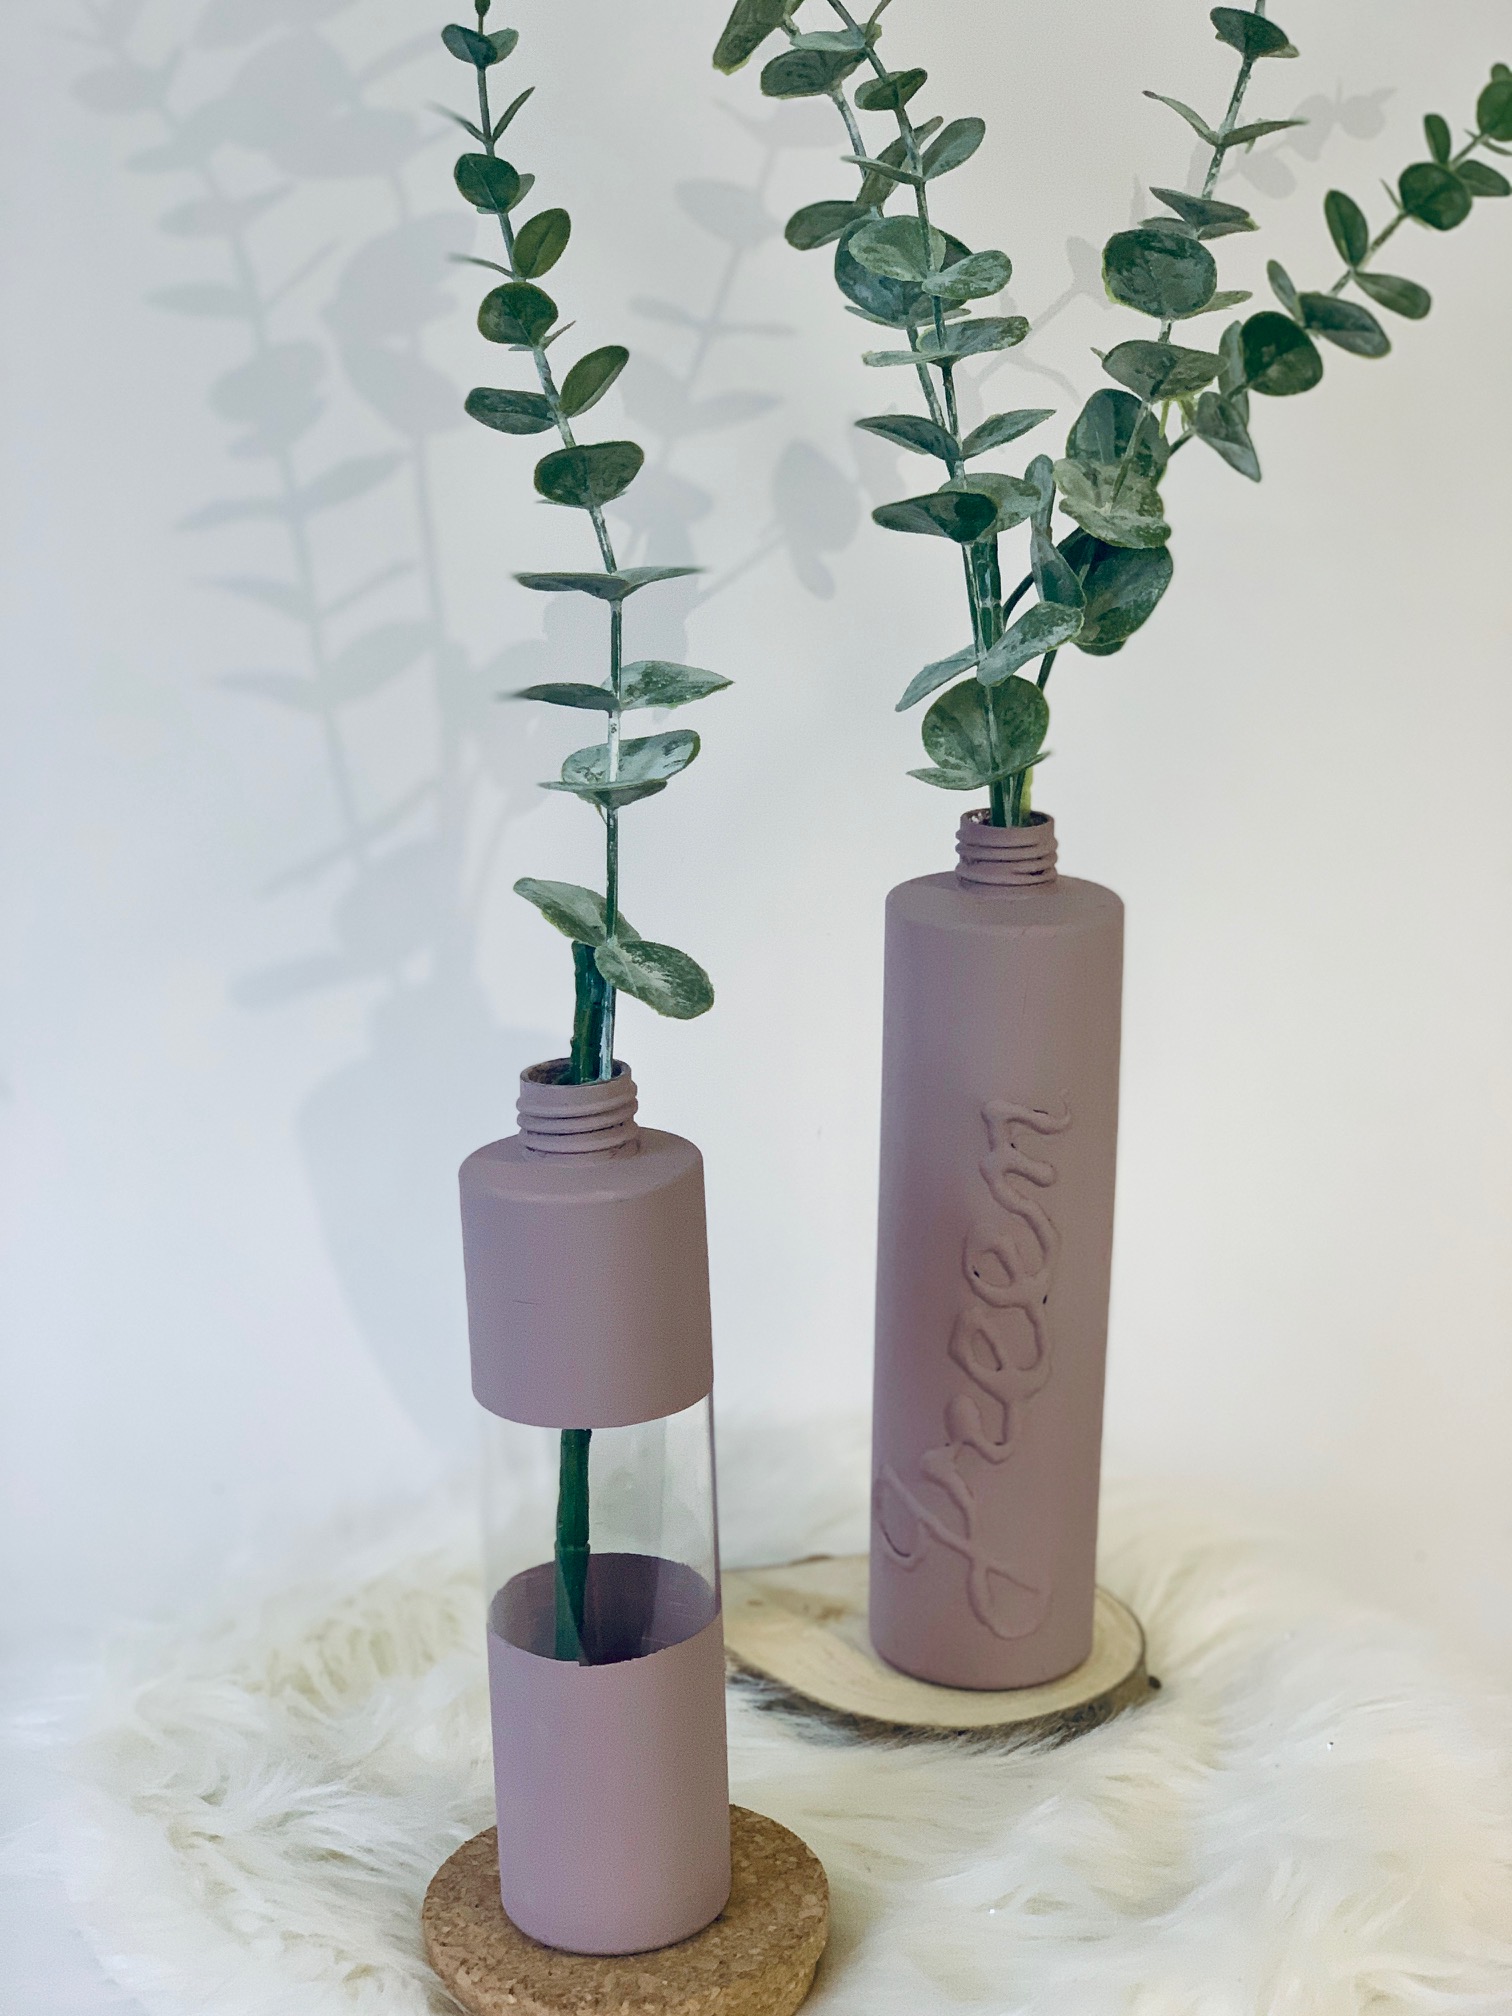
Storage case
What should you do with an empty bottle of floral water, a bottle of neutral base or any other bottle you have at home?
If you've run out of ideas for reusing your old packaging, here's an easy and practical tip!
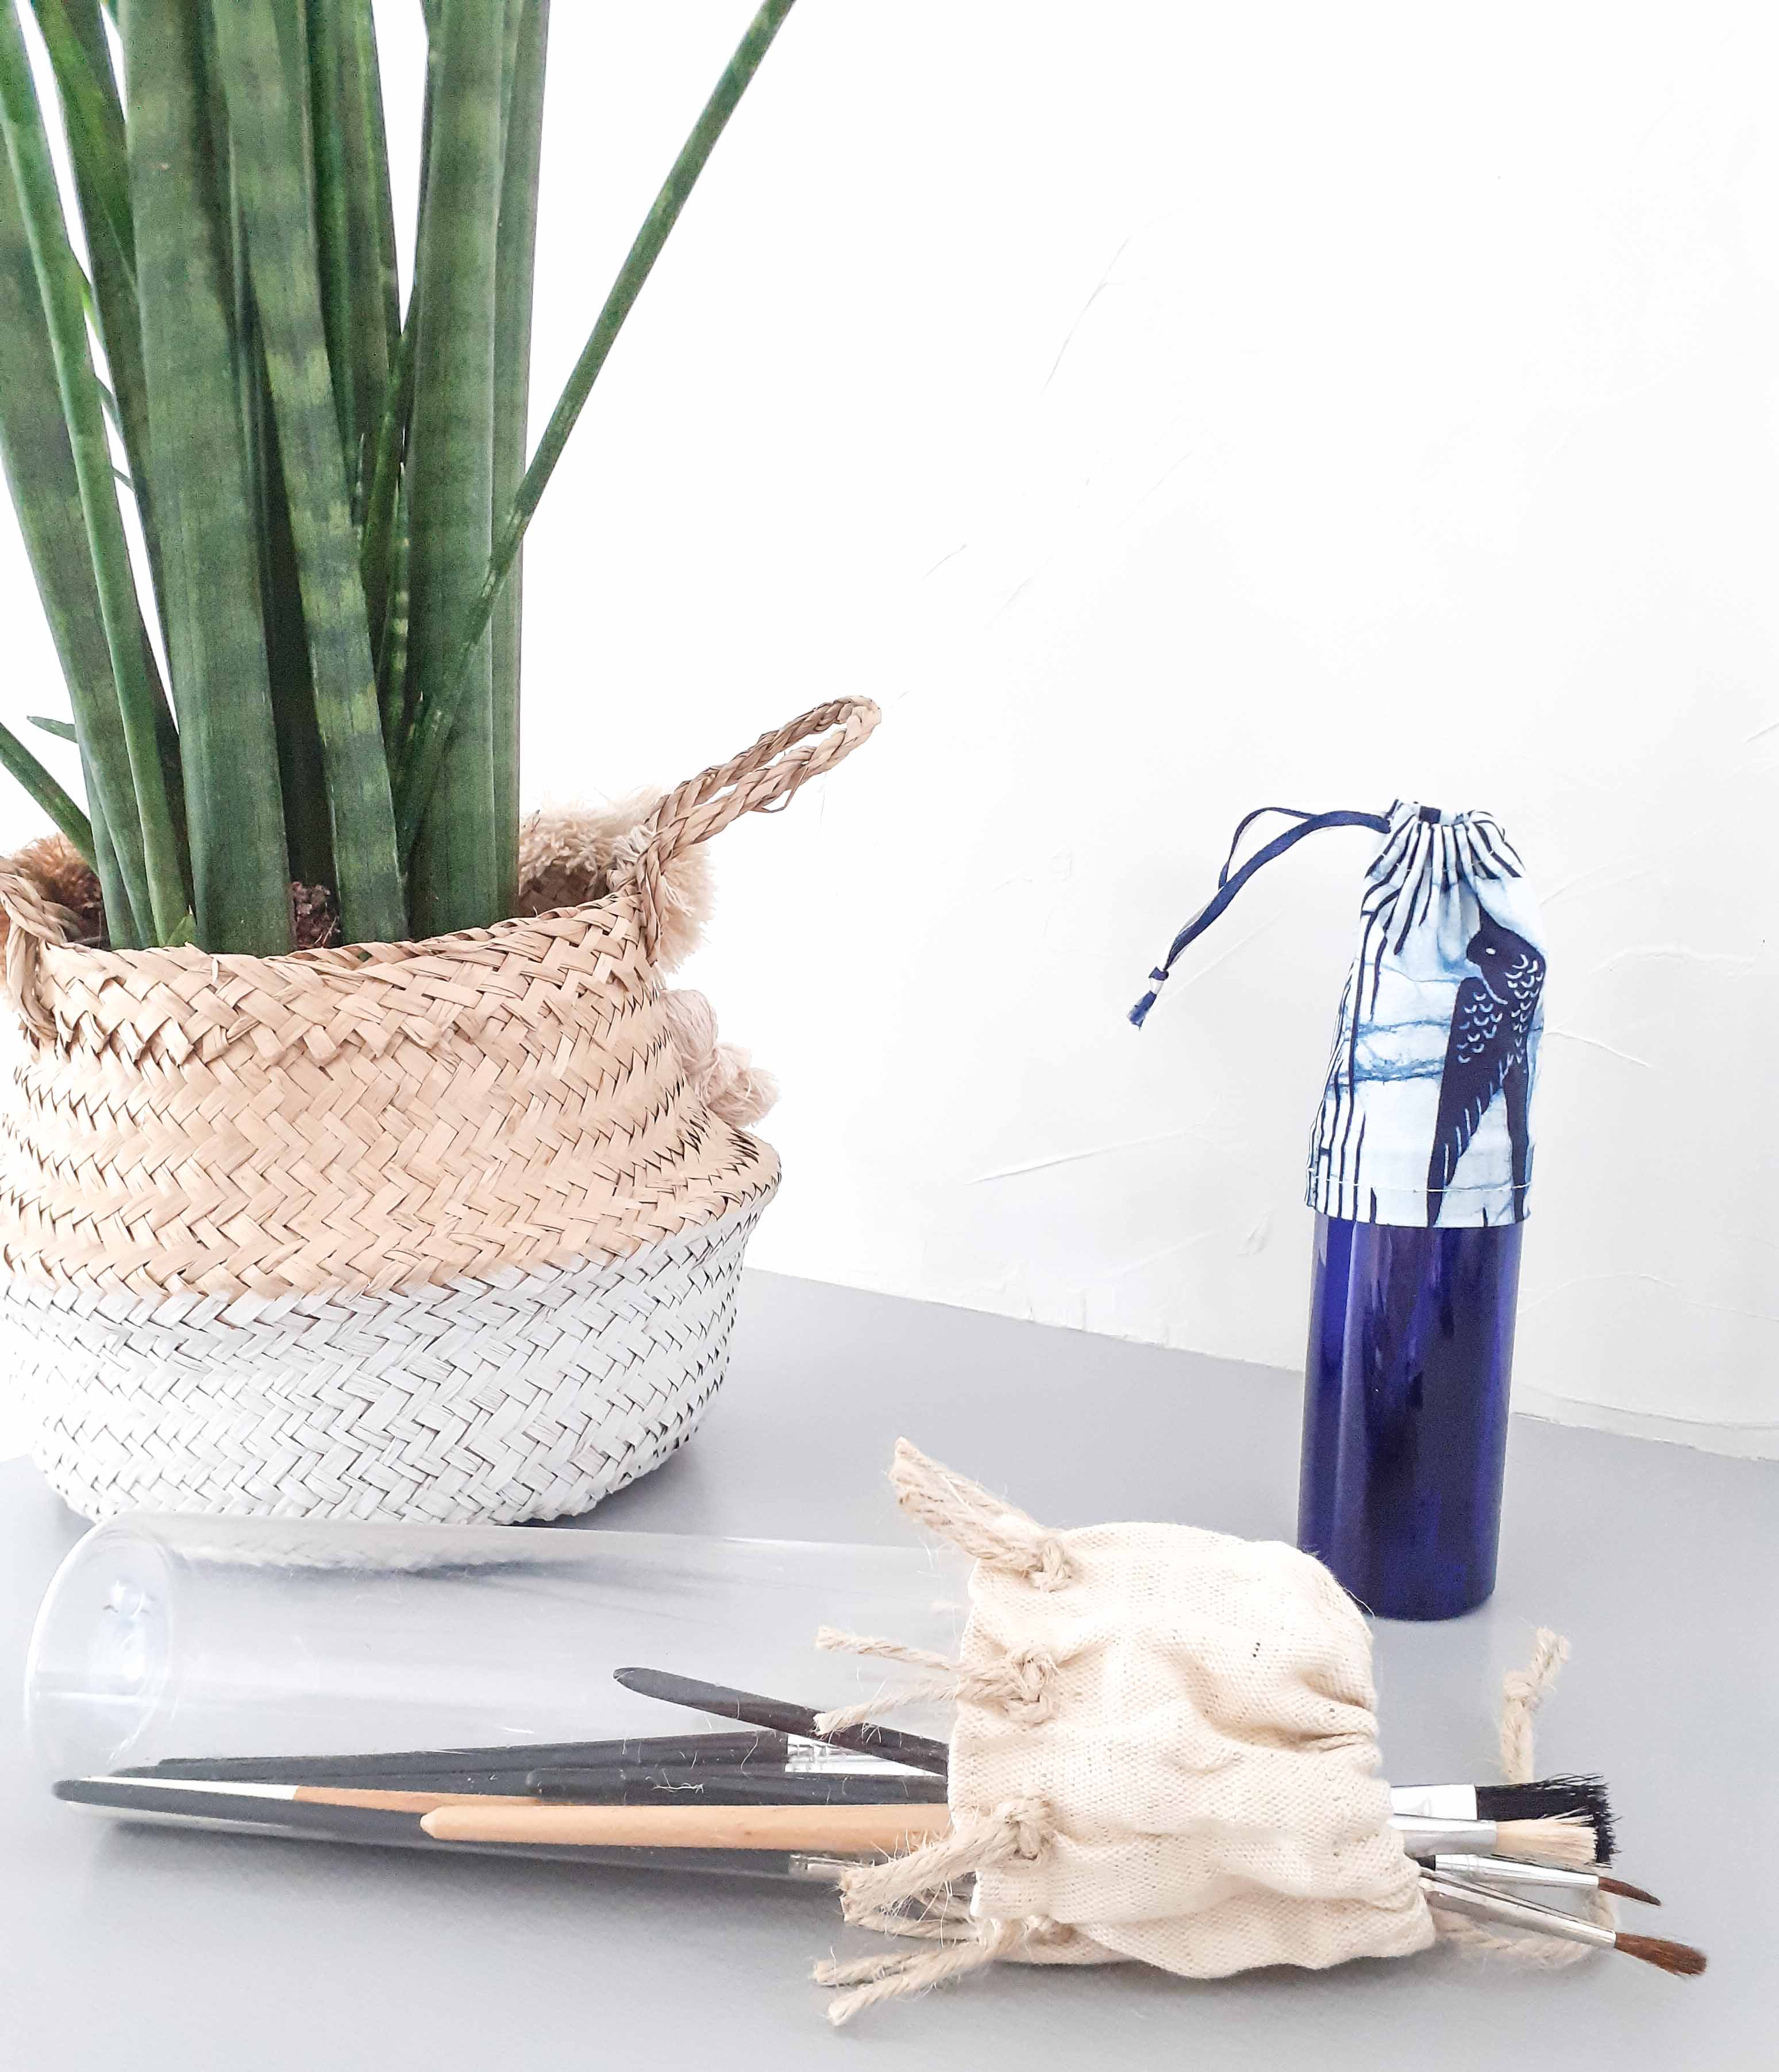
This storage case can be used by you or your children as a pencil case, or to hold beads, marbles or even make-up brushes.
Tuto for making a storage case
Materials required for a storage case:
- Your bottle of neutral base 400ml
- A piece of cloth (approx. 15x18cm for the floral water bottle)
- A pair of scissors
- Hot-melt glue gun (optional)
- A cutter
- String
- Needle and thread
Precautions: Before you start, remember to protect your work area to avoid leaving glue or paint marks on your table. Remember to clean your empty pot or bottle before you start.
Stages of production :
1 - Start by washing your empty bottle and removing the label (if you have trouble removing it, soak the container in lukewarm water or use nail polish remover to remove any remaining glue).
2 - Cut the top of the bottle with a cutter. You can use a lighter to smooth and soften the rim once the cut has been made, if required.
3 - Cut a rectangle of fabric the size you want. Stitch a seam along the top edge of the fabric for the cord or string you'll use to close your case.
4 - Thread your cord with a safety pin.
5 - Sew the two edges of the fabric (right and left) together to make a headband that you can slide over your bottle.
Assembly :
There are two options for assembling the fabric part and the bottle:
OPTION 1
Using hot glue. Slide the band onto your bottle and glue with hot glue for about 1cm to ensure a secure fit.
OPTION 2
Heat a needle with a lighter to make holes all around the top of the bottle you've cut out. Make the same holes in your fabric. All that's left to do is insert the fabric band around your flask and thread through the holes in the fabric and flask to secure the two together.
Your case is ready. You can slip in all your little treasures: pencils, markers, beads, brushes, toothbrushes or make-up brushes !
WAAM tips
If you like, you can then make pom-poms from the same rope or wool and add them to suit your taste.
You can adjust the height of your case as you wish by cutting your bottle more or less.
Why not personalize your case even more for your child? You can embroider your child's first name or the word of your choice on the fabric.
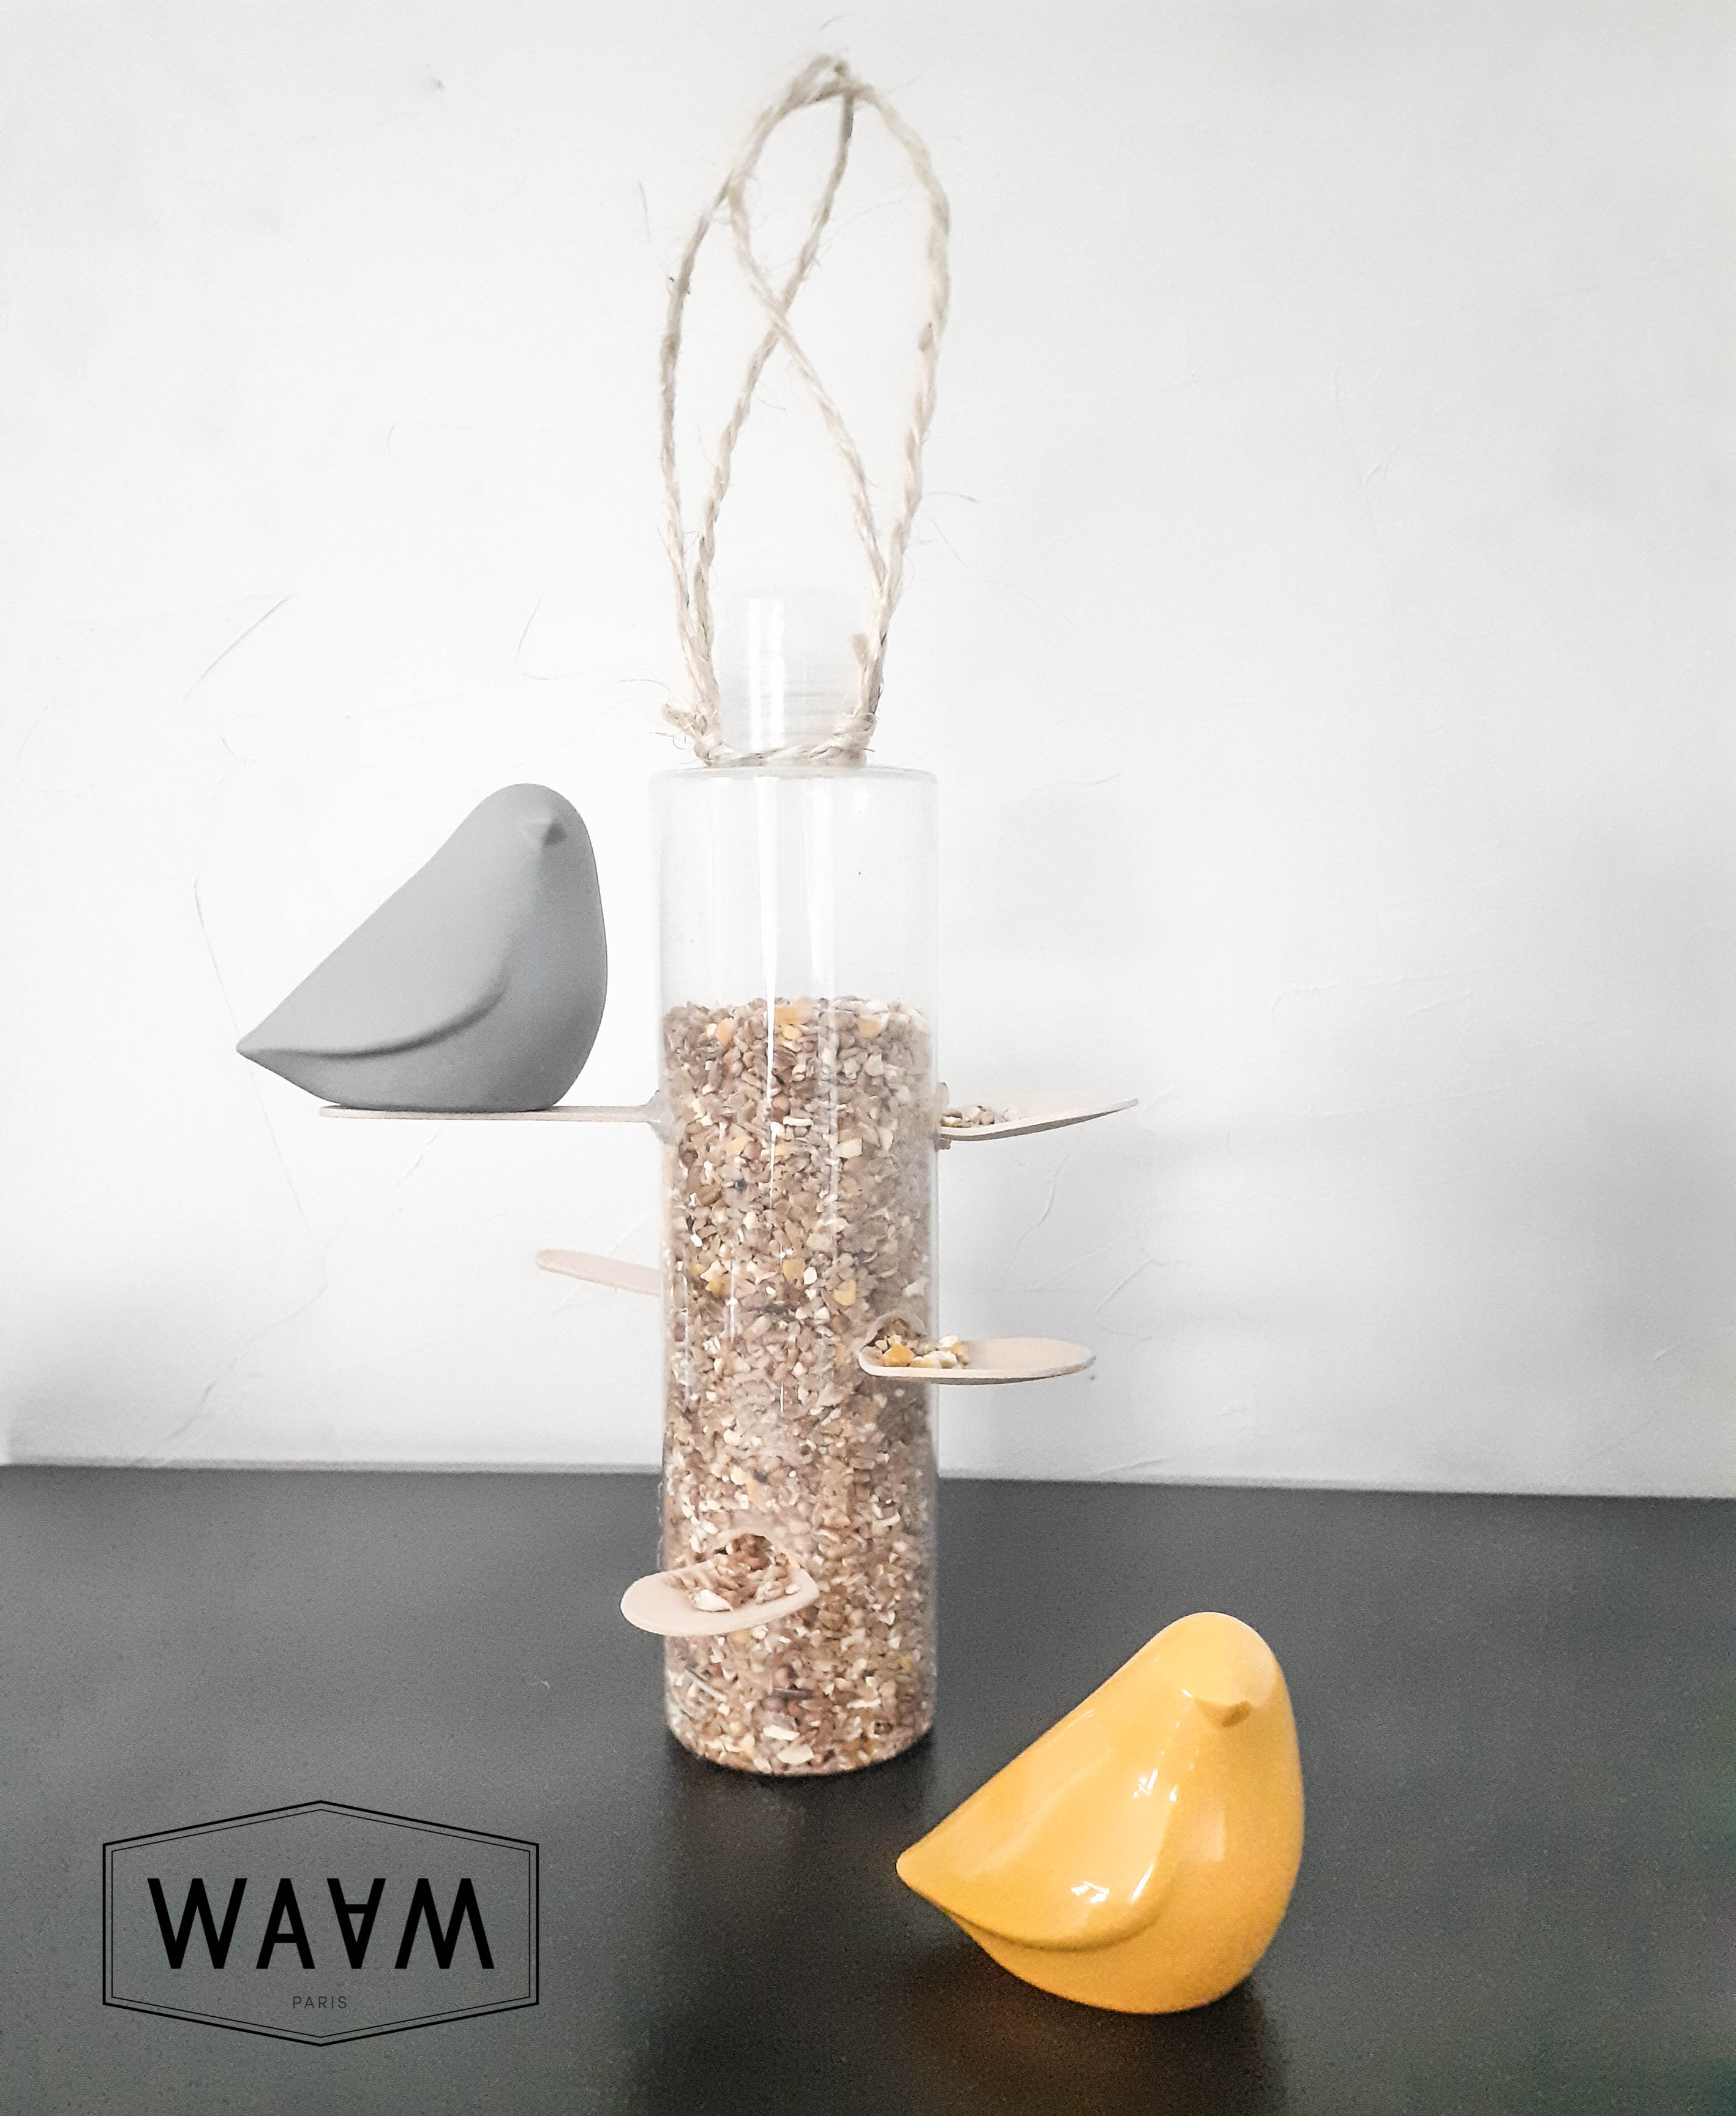
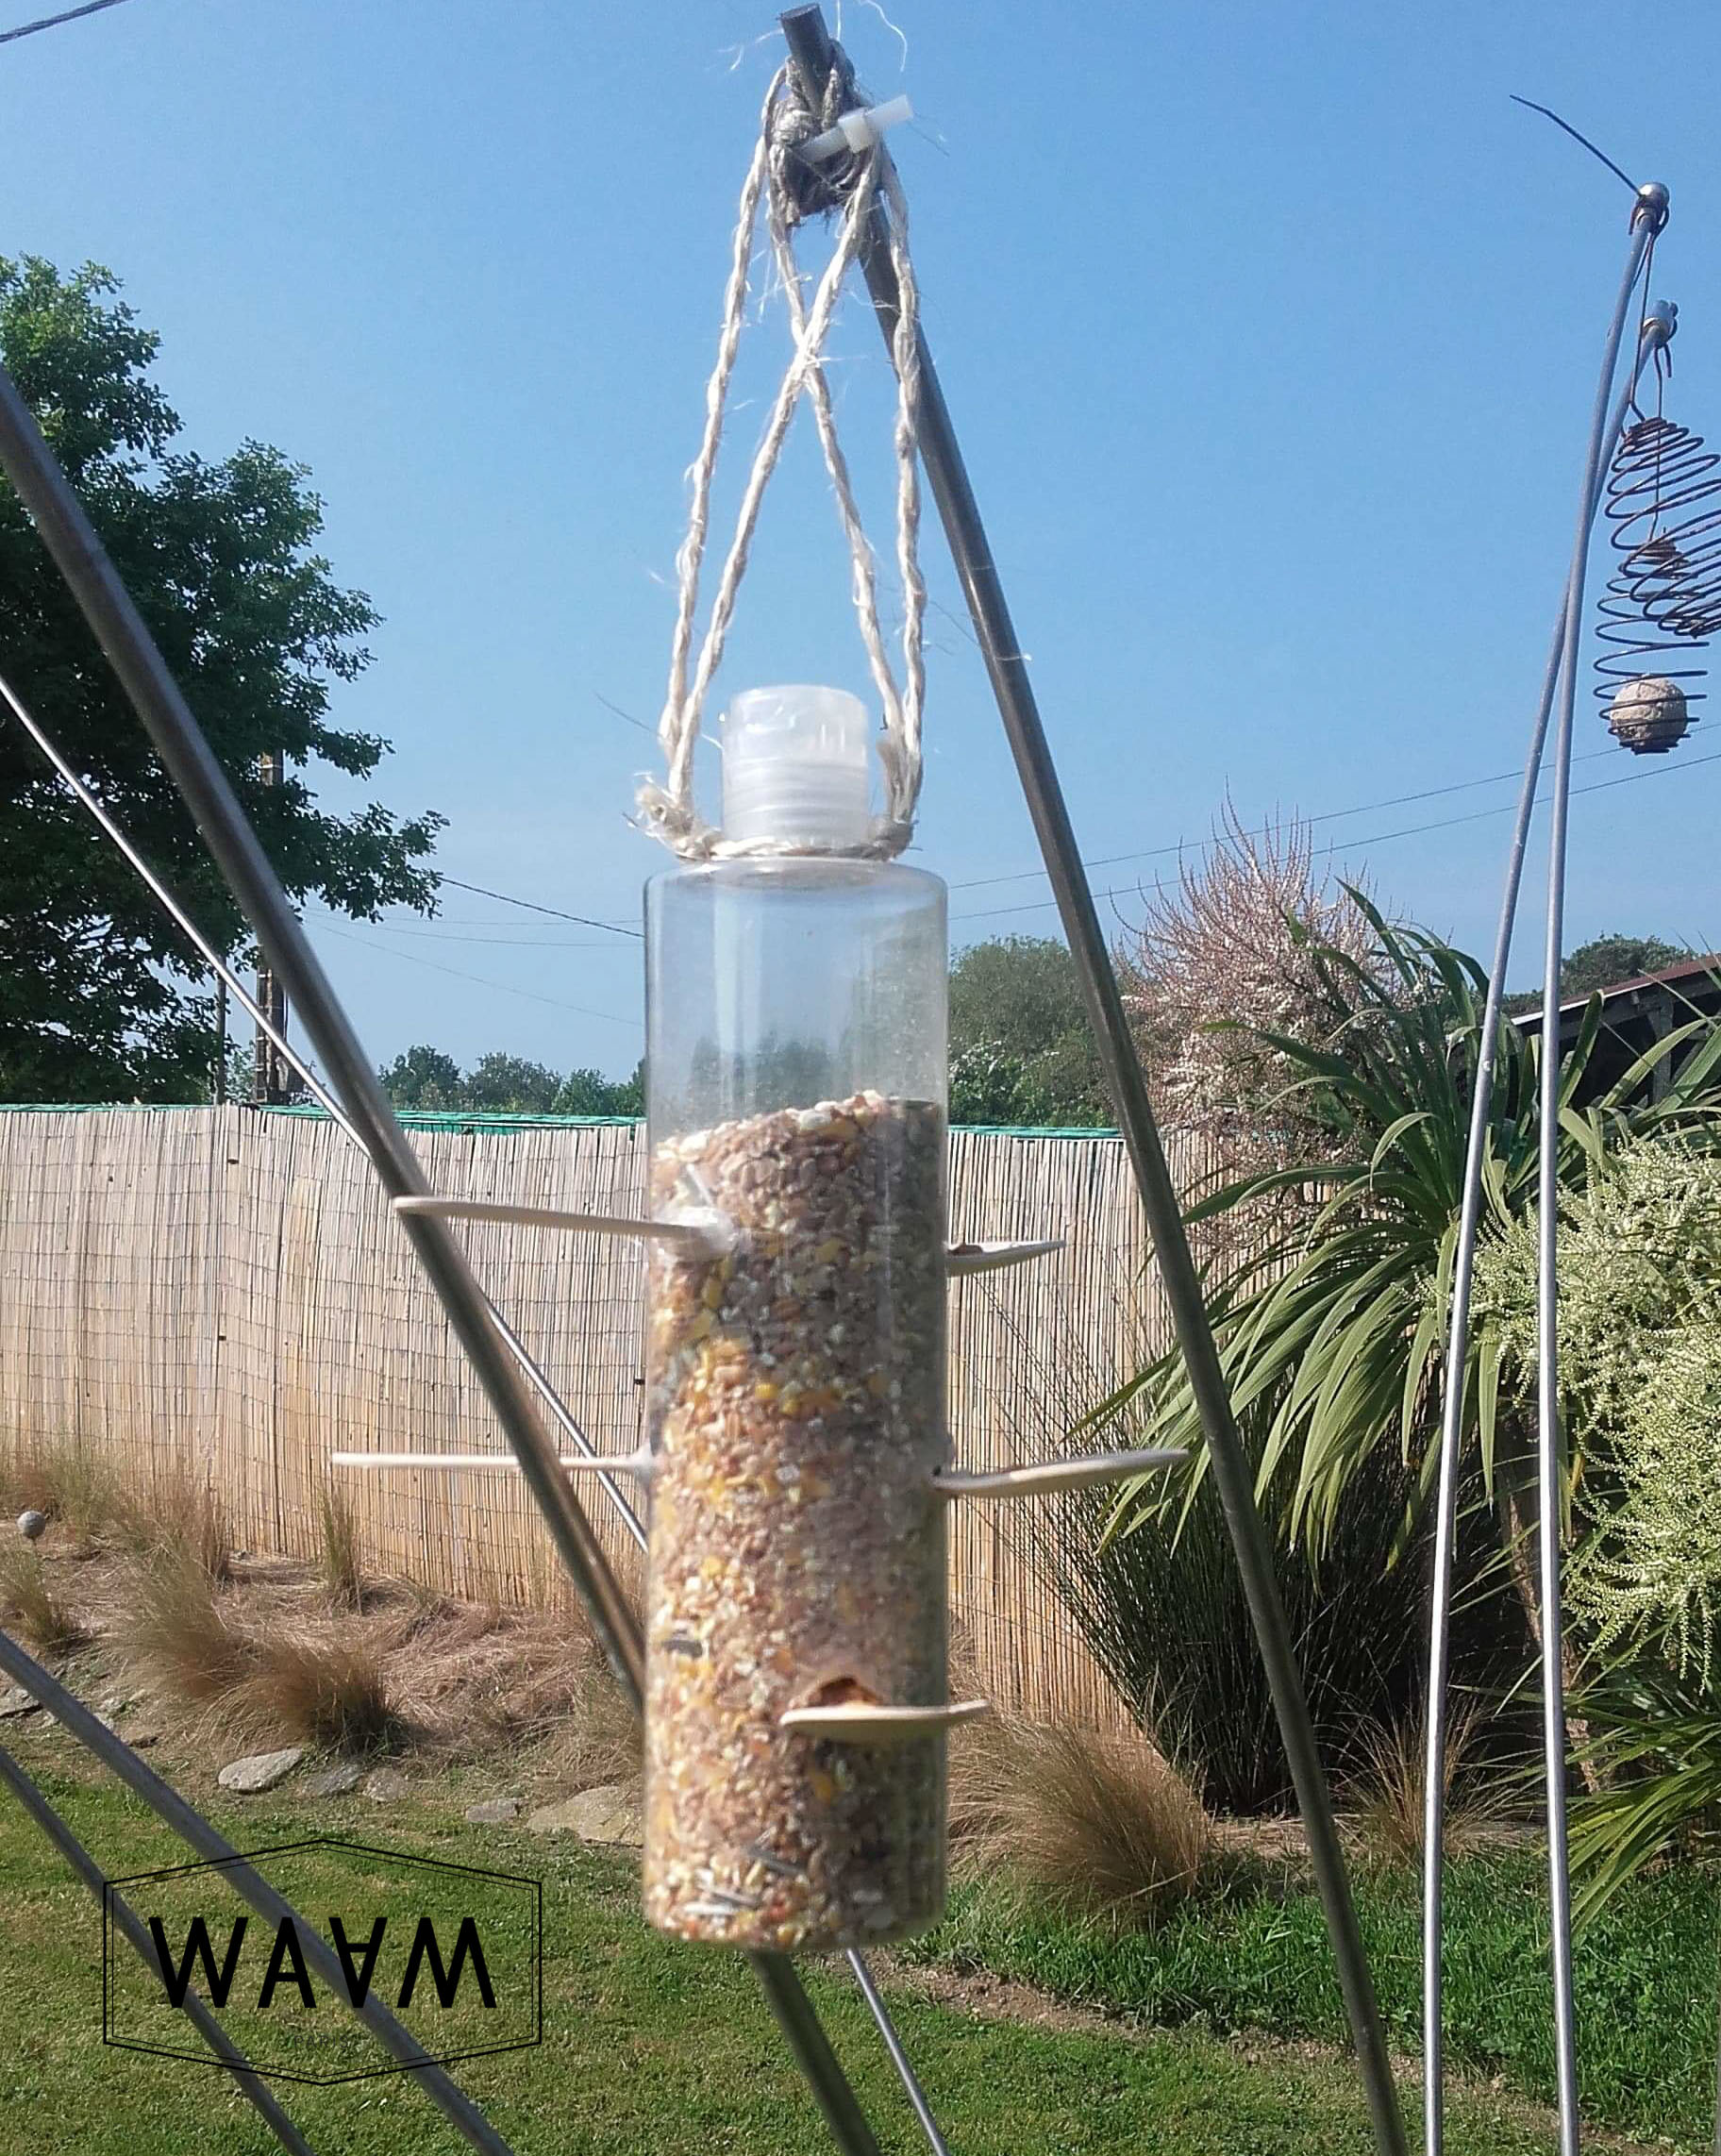
Bird feeder
Our tip for attracting birds to your balcony or garden! Easily make your own bird feeder from your empty bottle.
Tuto for making a bird feeder
Materials required for a bird feeder:
- - Your bottle of neutral base 400ml
- - Two or three bamboo or wooden spoons
- - Hot-melt glue gun (optional)
- - A cutter
- - A marker
- - String
- - Bird seed
Precautions: Before you start, remember to protect your work area to avoid leaving glue or paint marks on your table. Remember to clean your empty pot or bottle before you start.
Stages of production :
1 - Start by washing your empty bottle and removing the label (if you have trouble removing it, soak the container in lukewarm water or use nail varnish remover to remove any remaining glue).
2 - Before you start cutting with the cutter, use a marker pen to make marks on both sides of the bottle.
The aim is for the spoon you insert into the slots to pass horizontally through the bottle. You can put as many spoons as you like, but make sure you leave enough room for the birds to land if you want to have a chance of spotting them ;)
3 - Once you've made your markings, use your cutter to create your slot in the bottle.
4 - Insert the bamboo spoons into the slots.
5 - To hold the spoons firmly in place, if your slots are a little too wide, you can apply a dot of hot glue to the slot. Note that you can only do this on the handle side of the spoon. On the other side of the spoon, the seeds must be able to drain.
6 - Once all the spoons are in place, fill your bottle with birdseed.
7 - All that's left to do is hang it from a branch in your garden or on your balcony. Just tie a piece of string around the cork.
Your bird feeder is ready! Wait a few hours for the birds to find their new canteen, and once they're used to it, they won't be able to do without it.